How to Use Postman?A Comprehensive Guide from Basics to Core Features
With this guide, you will have a comprehensive understanding of how to use Postman. From basic concepts to core features, Postman provides rich and powerful tools for API development and testing.
In modern software development and API testing, Postman has become an indispensable tool. It provides an intuitive and powerful interface that helps developers easily build, test, and debug APIs. This article will delve into how to use Postman, covering basic concepts to core features, enabling you to make the most out of this tool.
Step One: Download and Install
Let's begin with downloading and installing Postman. Postman supports multiple platforms, including Windows, macOS, and Linux. You can download the version for your operating system from the official website. The installation process is straightforward; simply follow the instructions provided by the installation wizard.
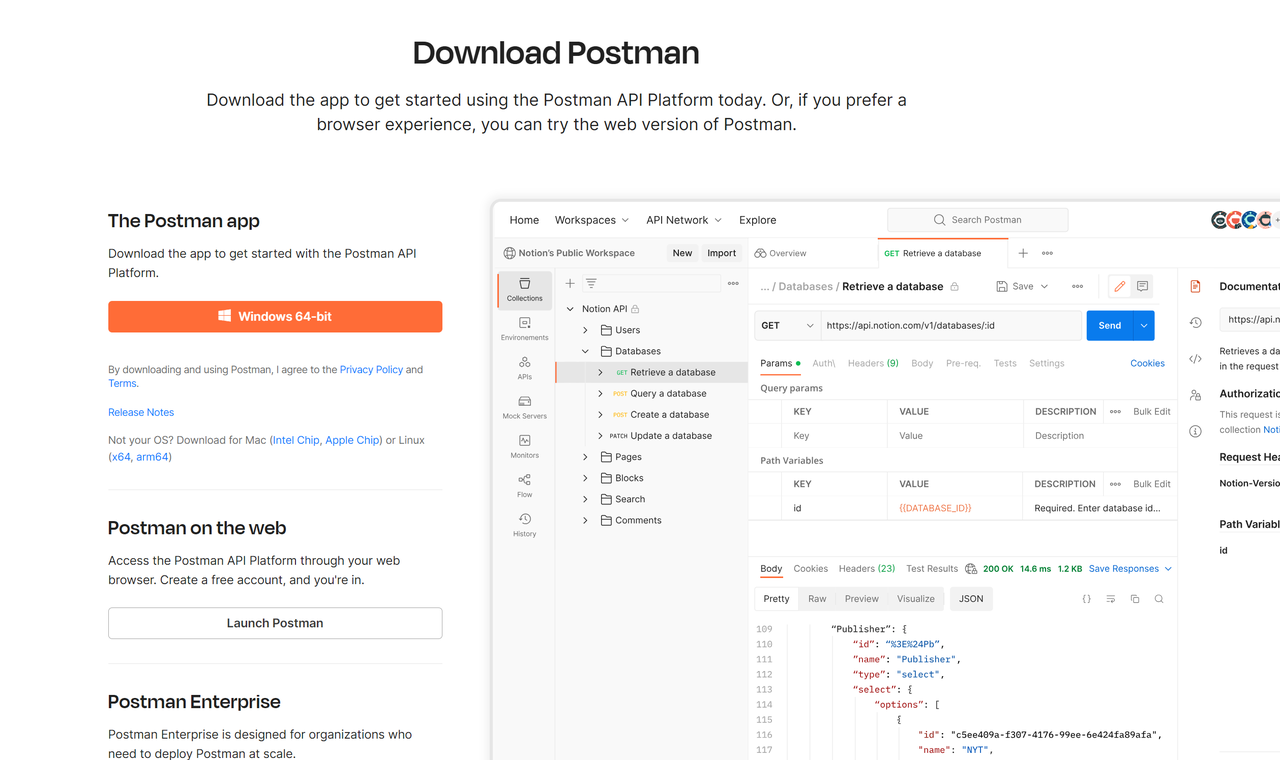
Once installed, launch Postman. You'll be greeted with a friendly welcome screen, so let's dive into the exciting world of Postman!
Step Two: Basic Concepts
Before we explore the core features of Postman, let's understand some basic concepts.
1. Workspace
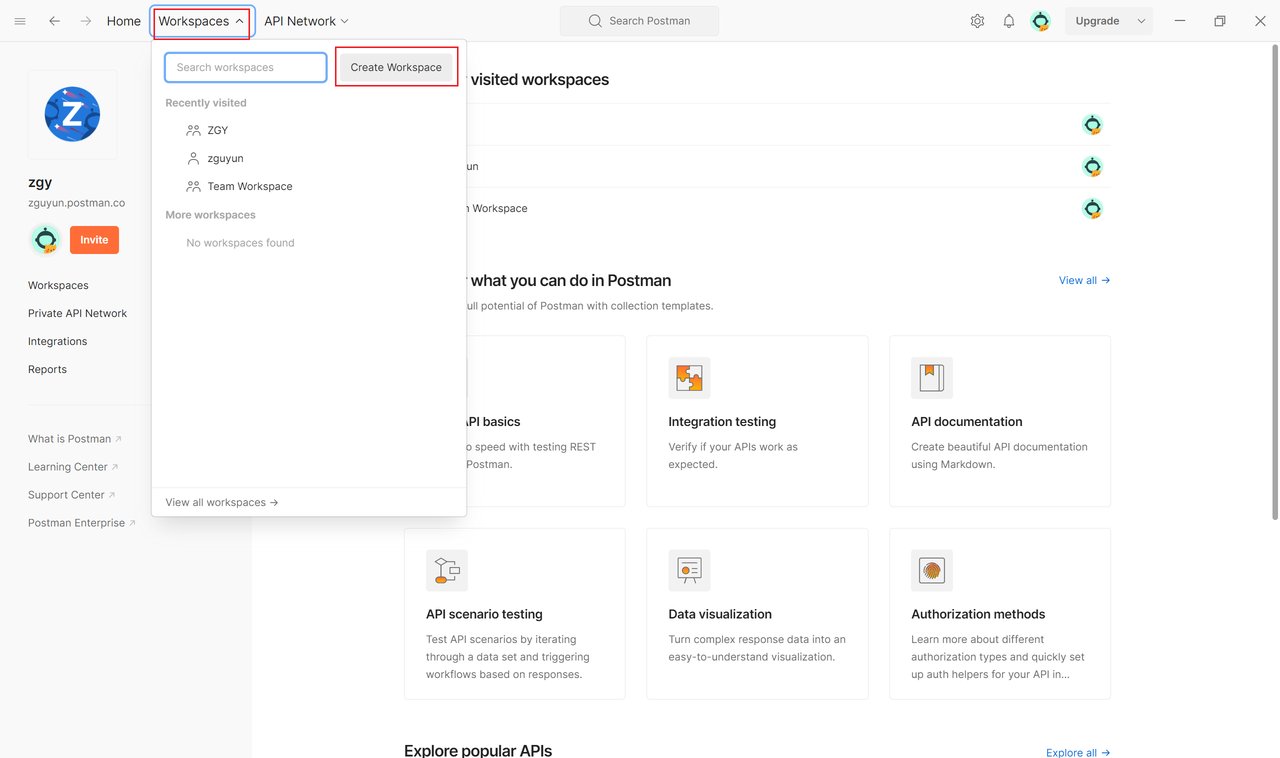
A workspace is where you organize and store requests, environments, and collections in Postman. A workspace can contain multiple collections, and each collection can contain multiple requests. This makes it easier to organize and manage API requests within a project.
2. Request
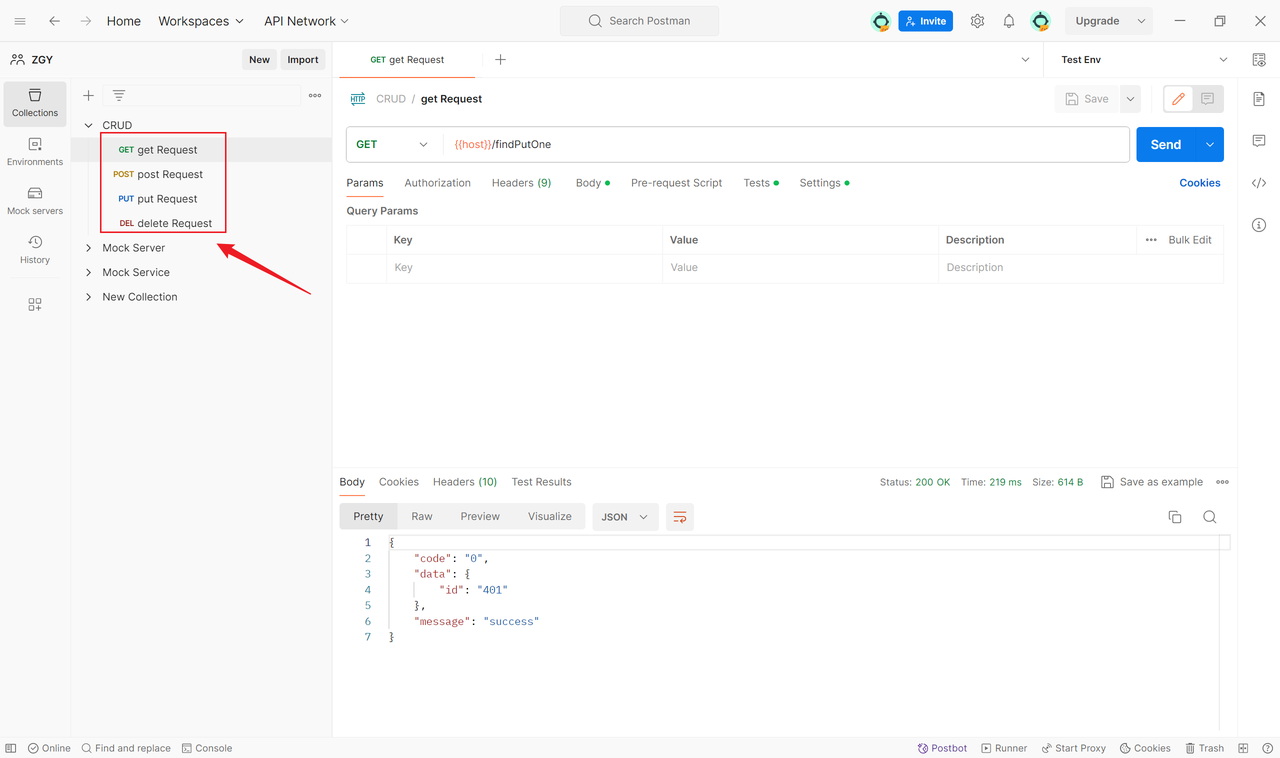
A request is a call to an API, including the HTTP method (GET, POST, etc.), URL, parameters, headers, and more. In Postman, you can create, save, and share requests, facilitating team collaboration and maintenance.
3. Environment
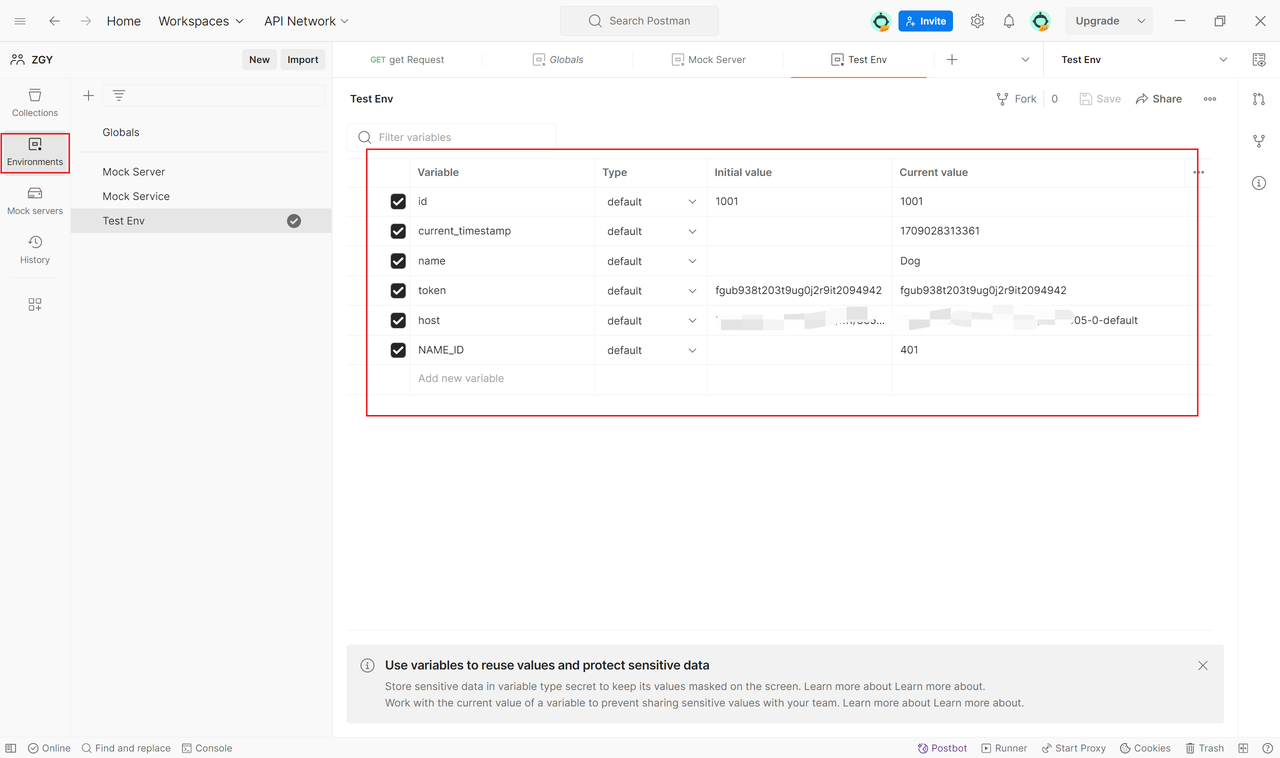
An environment contains a set of variables that can be referenced in requests. This enables easy switching between different environments without modifying hardcoded values in each request. For example, you can have a development environment and a production environment, switching between them without changing requests.
Step Three: Create Your First Request
Now that we understand some basic concepts, let's create your first request.
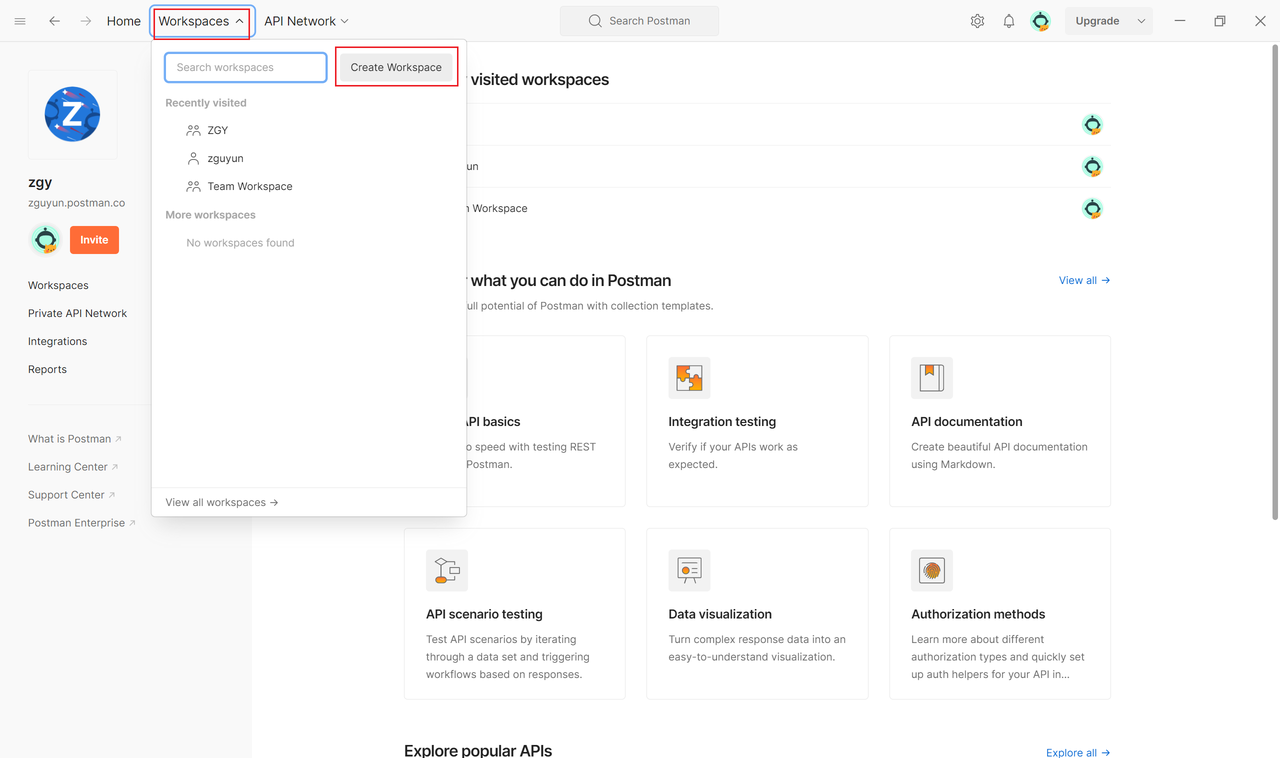
1. Open Postman and Create a Workspace
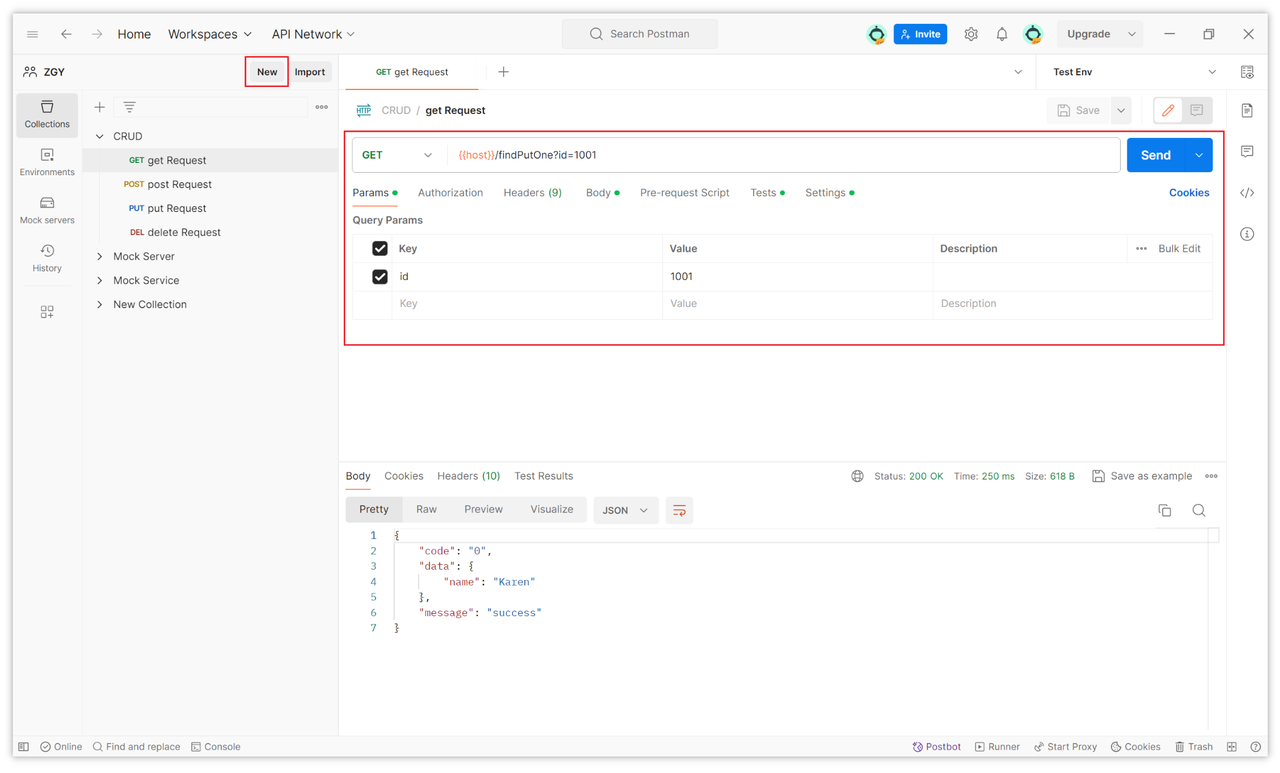
Open the Postman application, click the "New" button in the top left corner and select "Workspace",enter the workspace name and description, then click "Create Workspace."
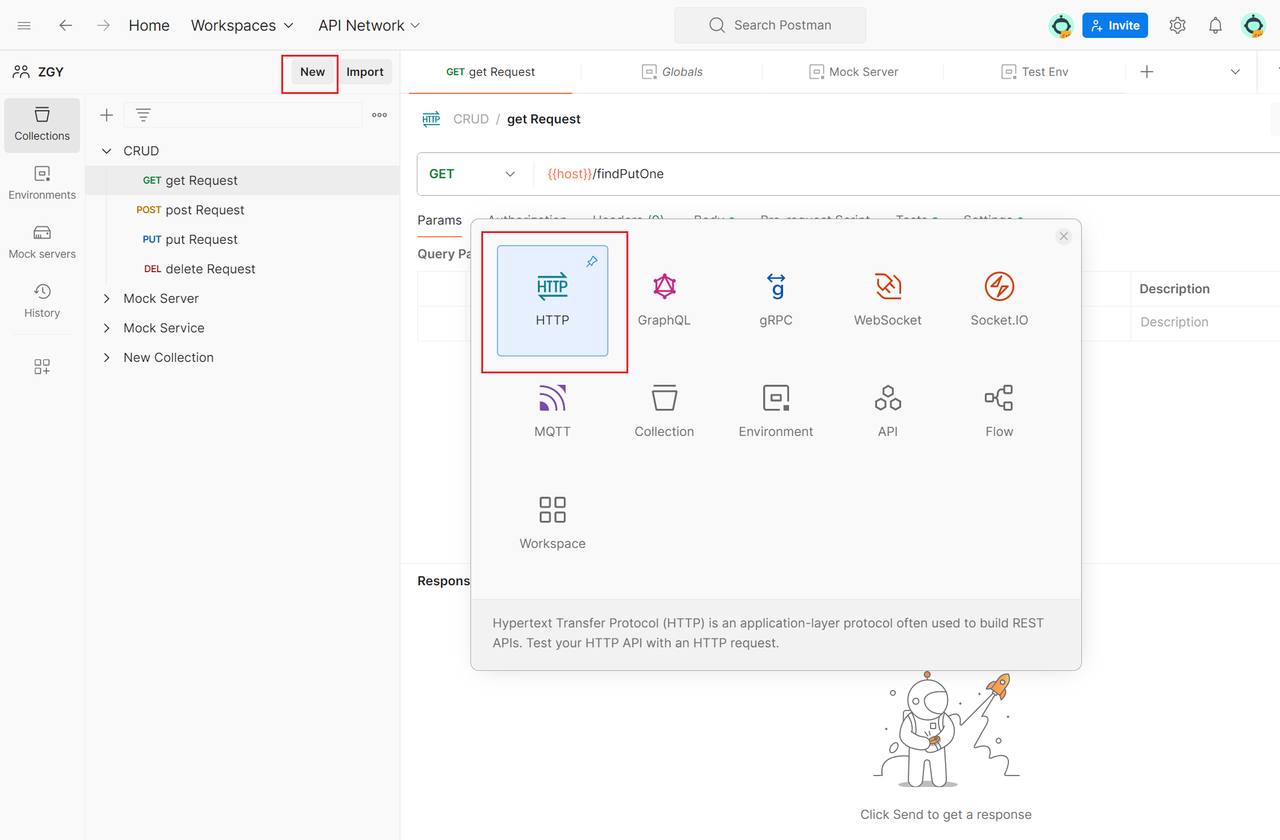
2. Create a Request
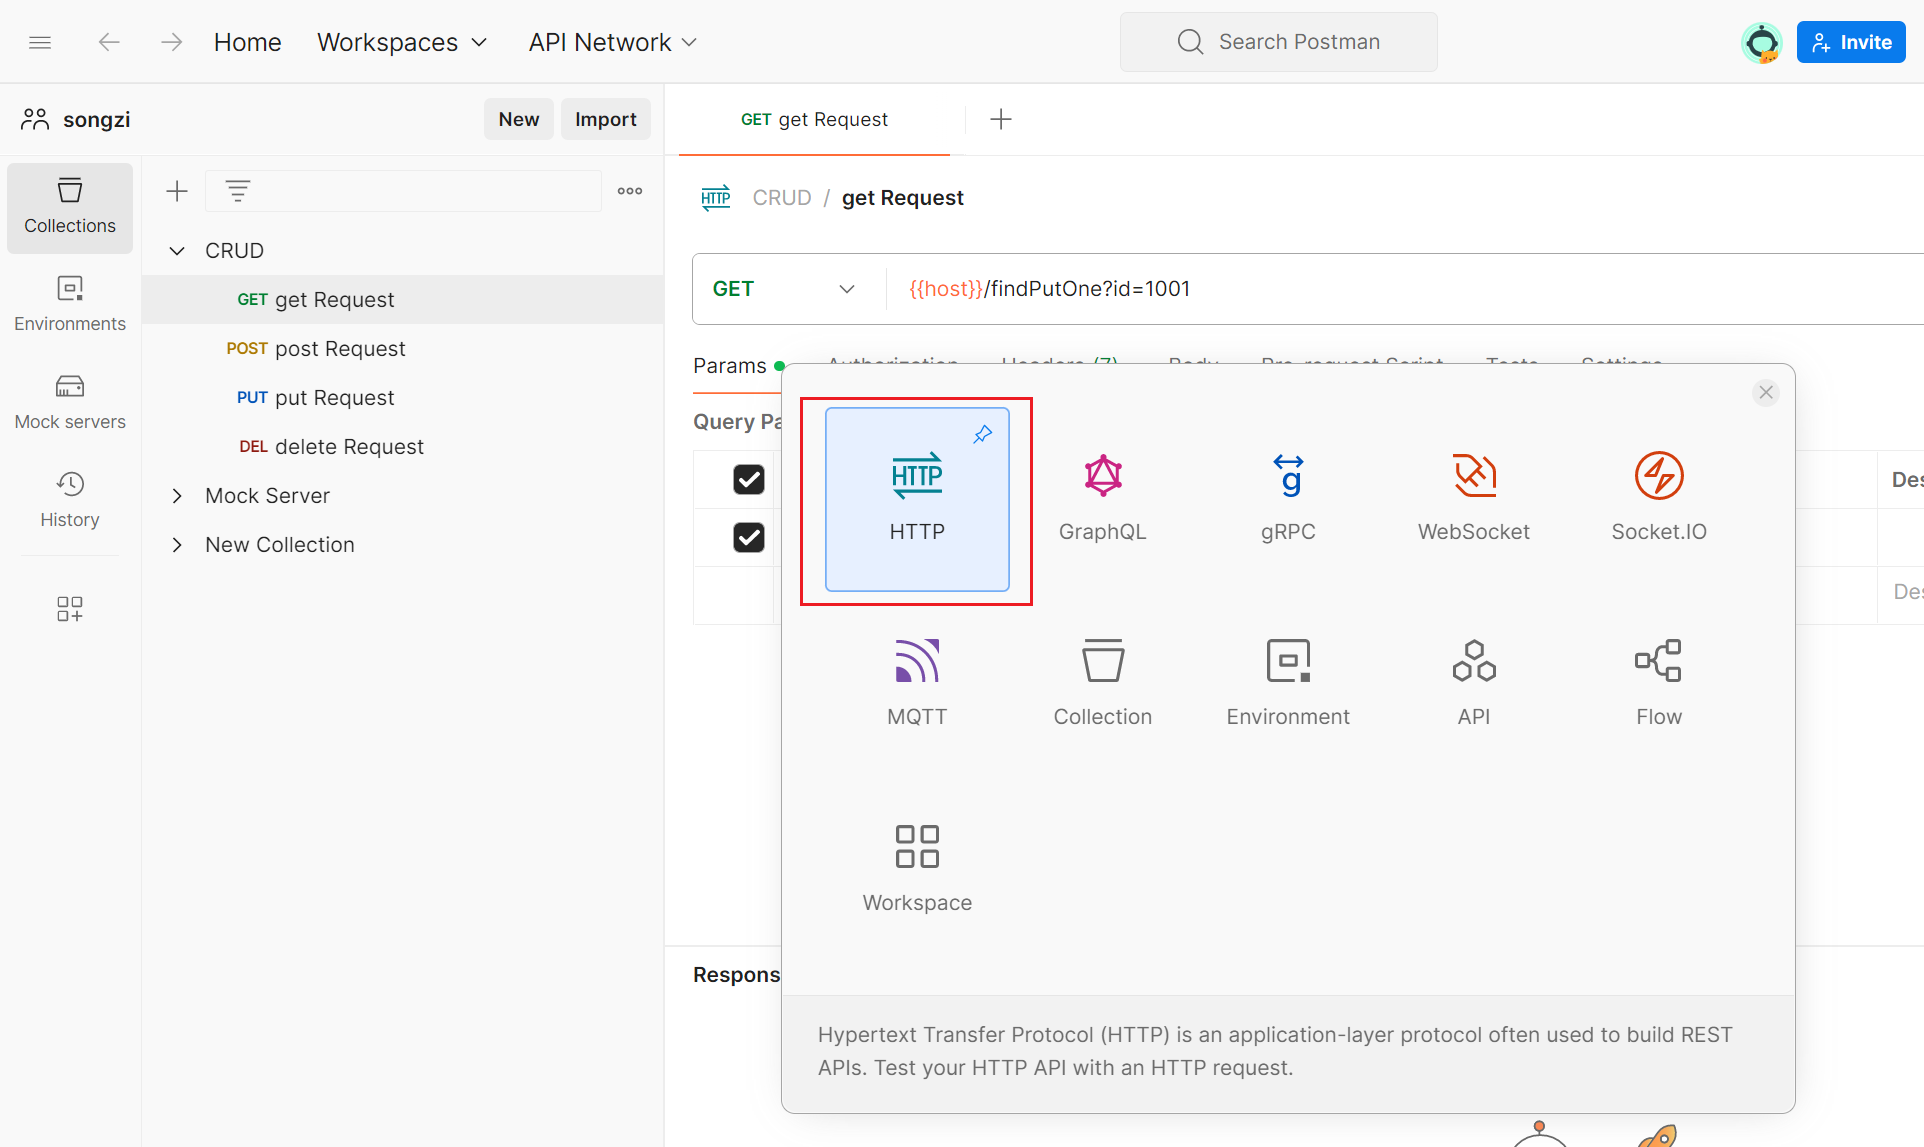
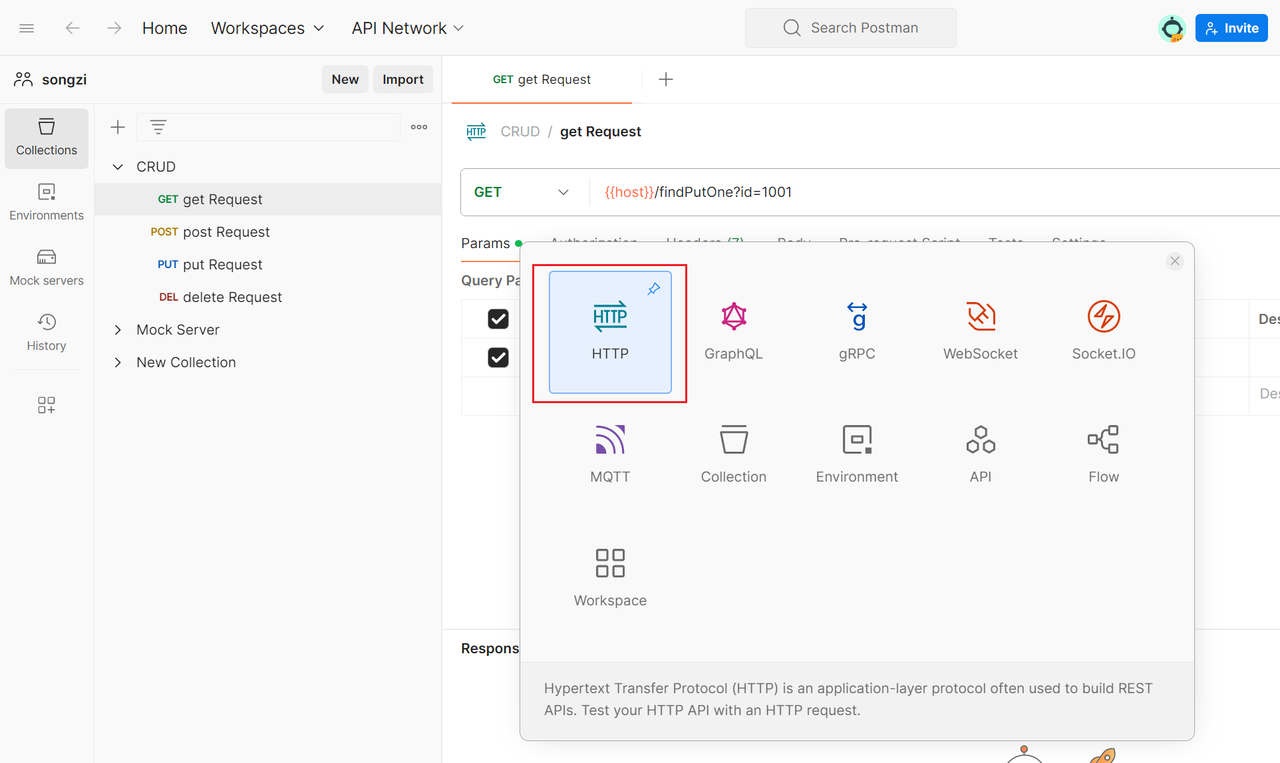
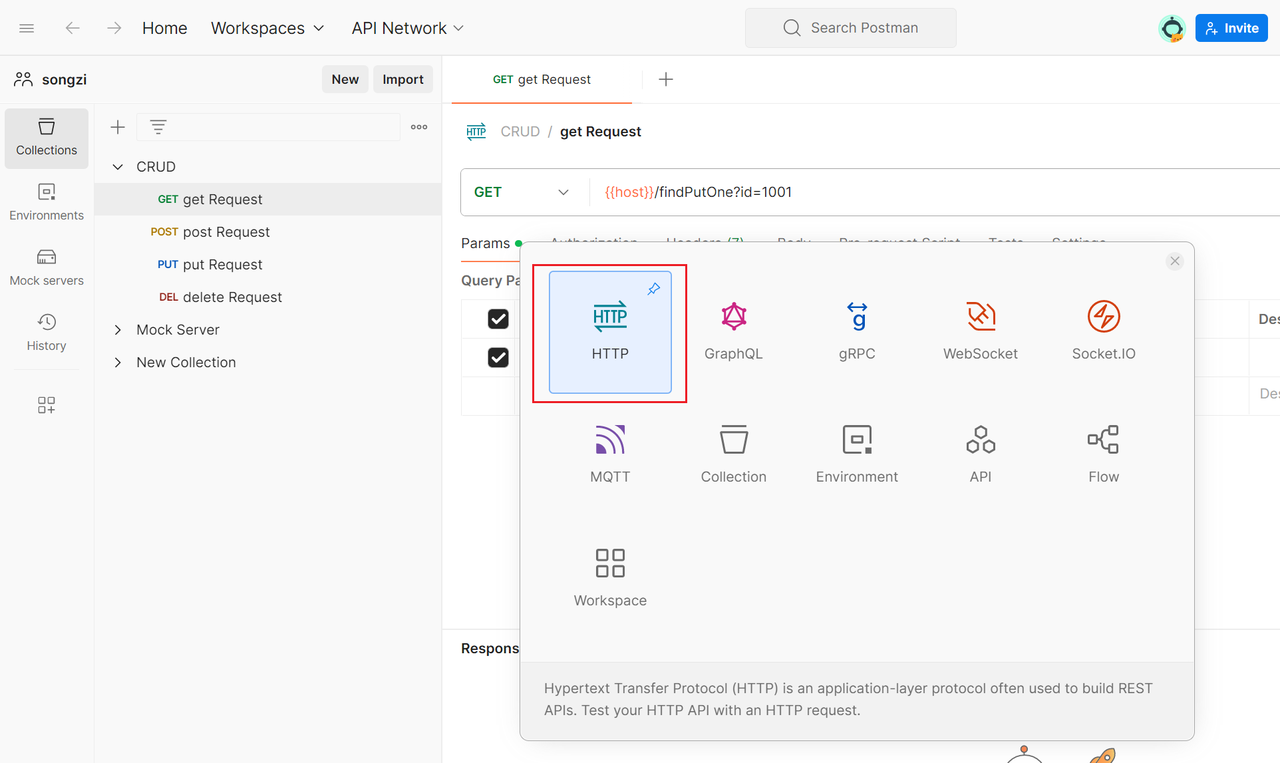
In the left-side navigation bar, select "Collections",click the "New Request" button and select "HTTP", enter the request name and description.
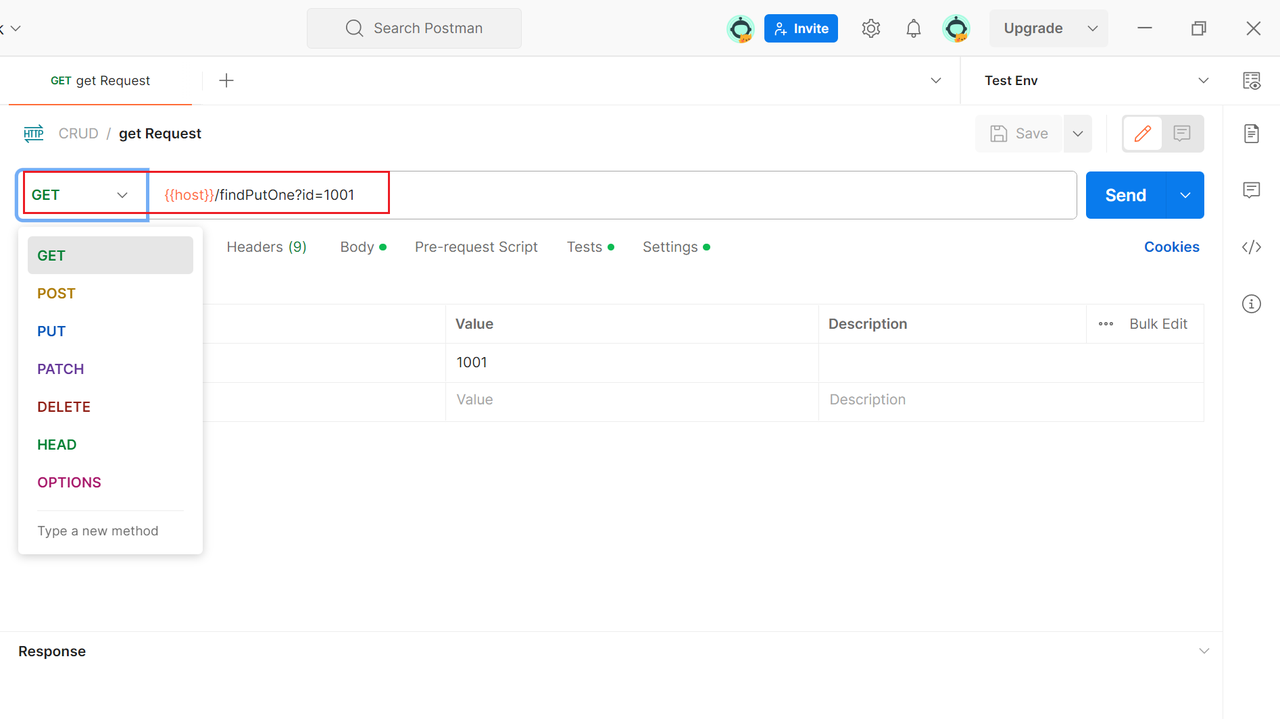
3. Configure Request Parameters
In the request editing interface, select the HTTP method (GET, POST, etc.),enter the API URL,In the "Params" tab, add any query parameters.
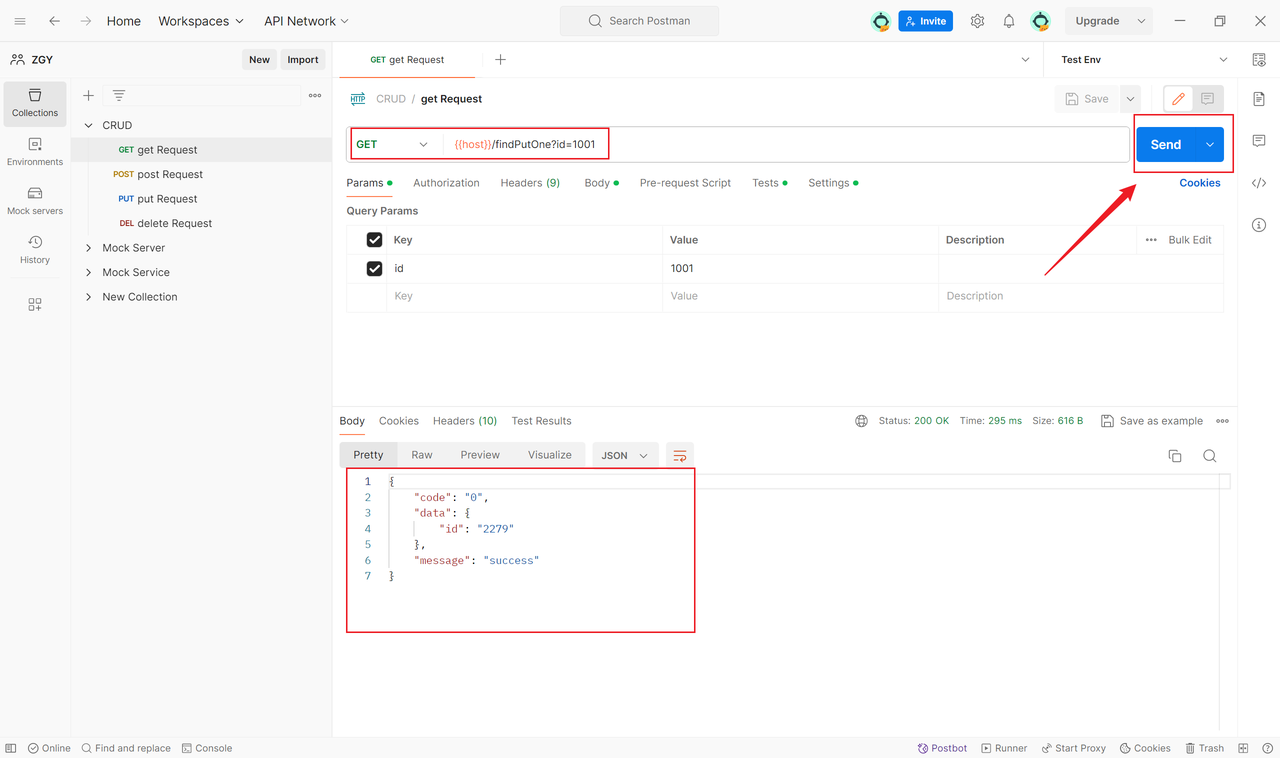
4. Send the Request
Click the "Send" button in the top right corner.Review the response, including the status code, response body, and more.
Step Four: Use Environment Variables
Using environment variables makes requests more flexible, especially when switching between different environments.
1. Creating an Environment
In the left-side navigation bar, select "Environments",click the "New Environment" button, enter the environment name and add variables along with their values.
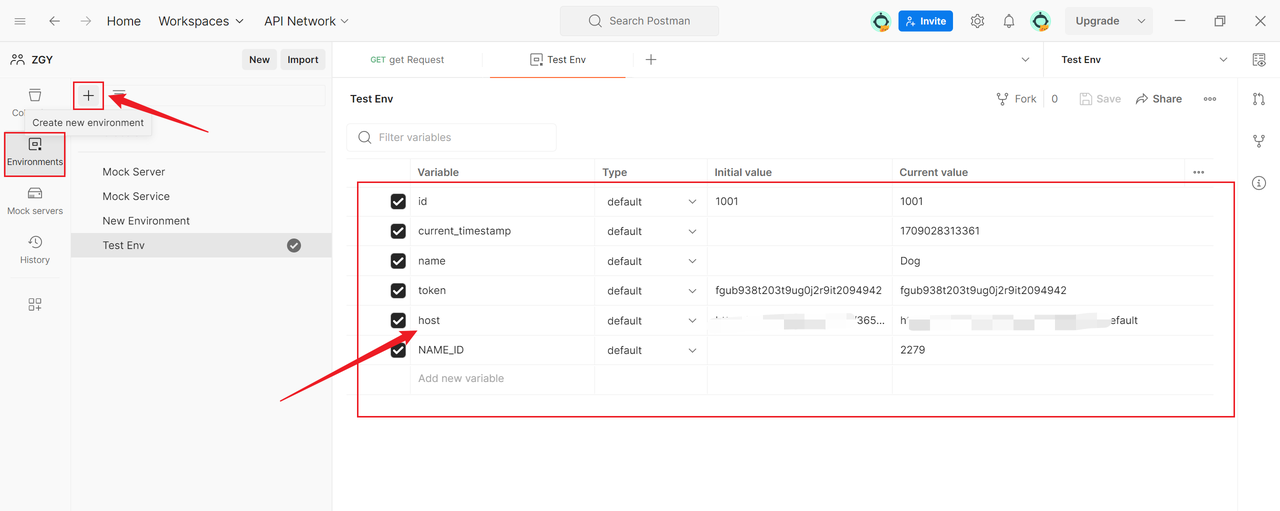
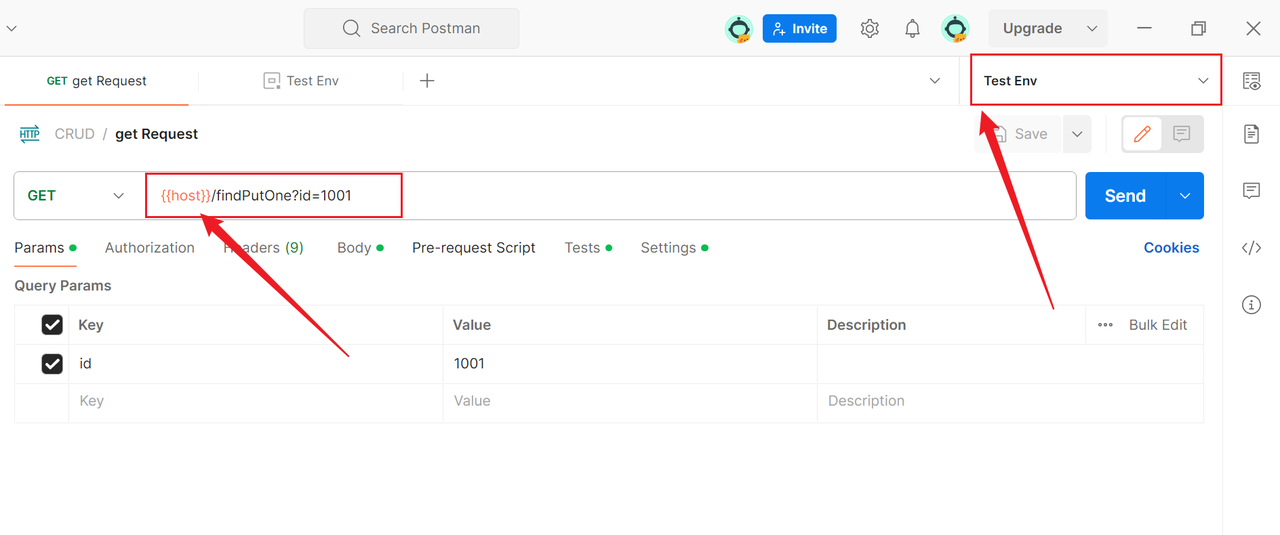
2. Use Environment Variables in a Request
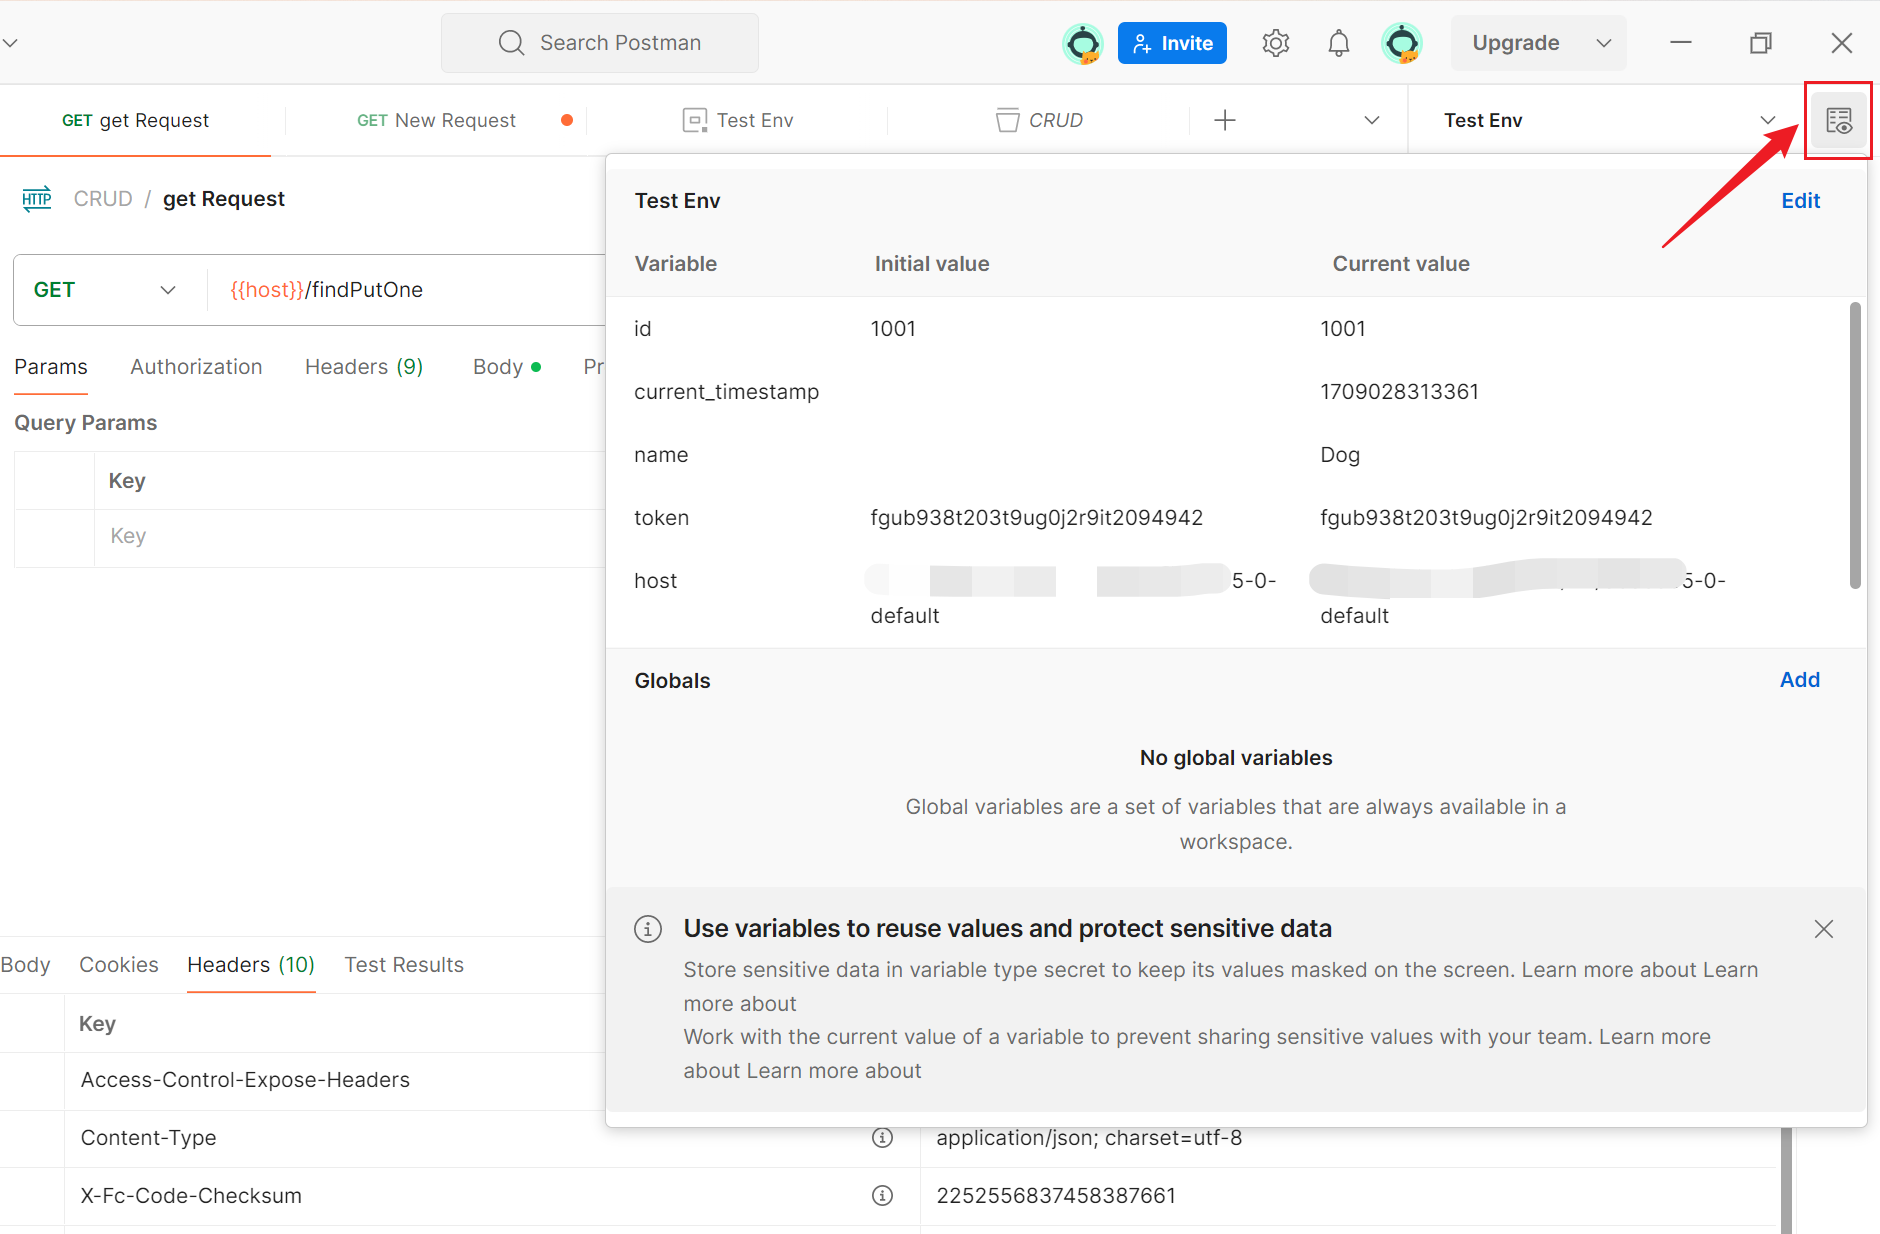
In the request editing interface, use the {{variable_name}} syntax to reference environment variables, such as {{host}}, switch environments in the "Manage Environments" in the top right corner.
Step Five: Organize Requests with Collections
Collections are containers for related requests, making it easier to organize and manage requests within a project.
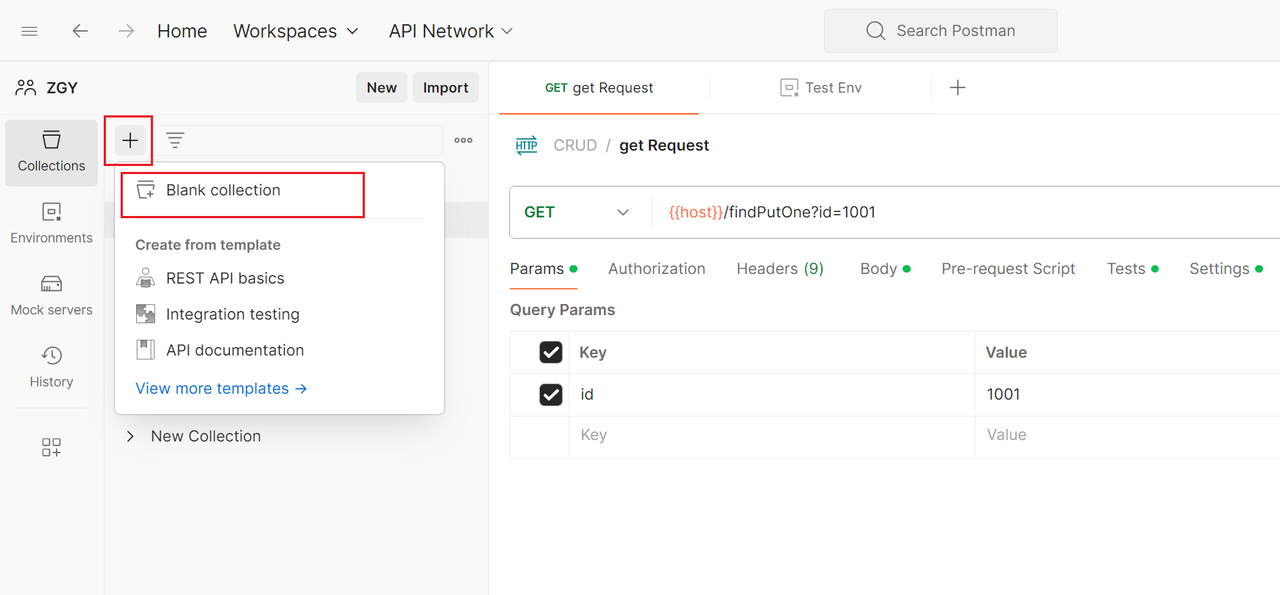
1. Create a Collection
In the left-side navigation bar, select "Collections", click the "New Collection" button, enter the collection name and description.
2. Add Requests to a Collection
In the request editing interface, select "Save" and choose the collection to save to.
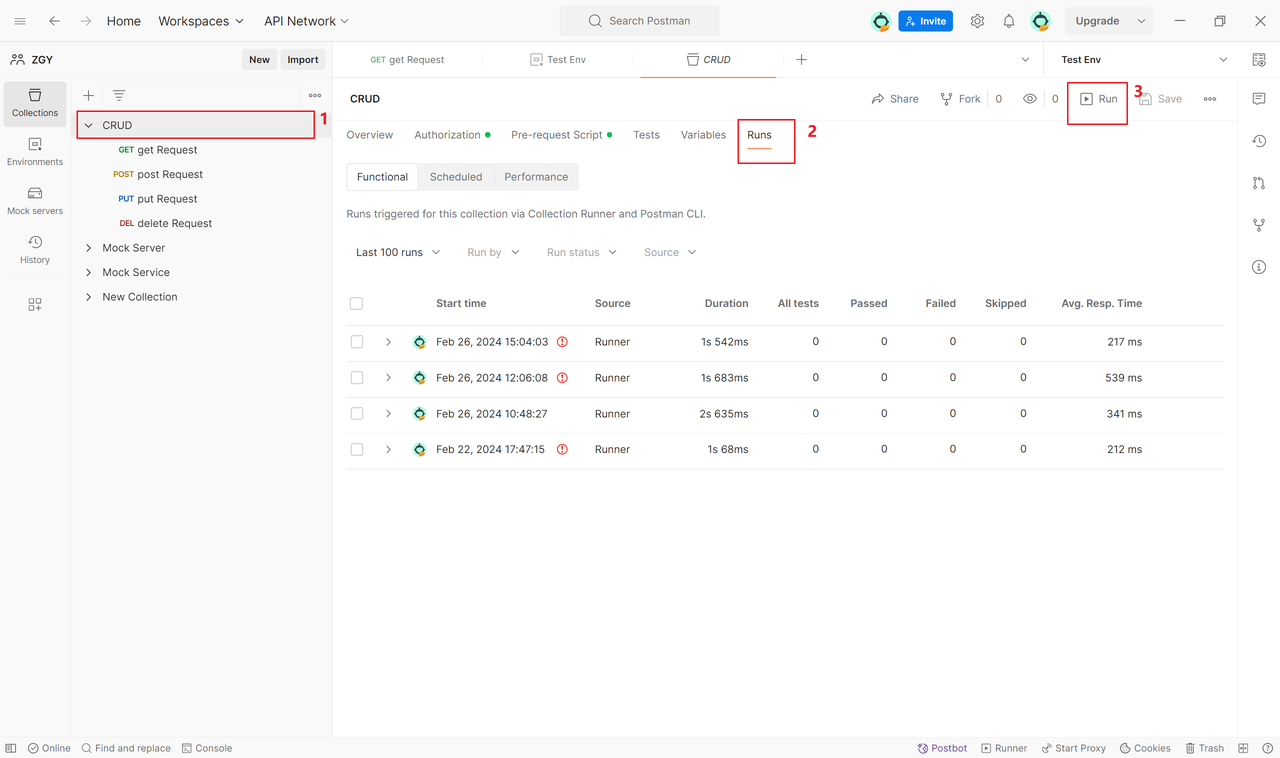
3. Run Requests in a Collection
In the left-side navigation bar, select "Runner",choose the collection to run and click the "Run" button.
Step Six: Use Test Scripts
Postman allows you to write test scripts to verify if the API response meets expectations.
1. Write Test Scripts
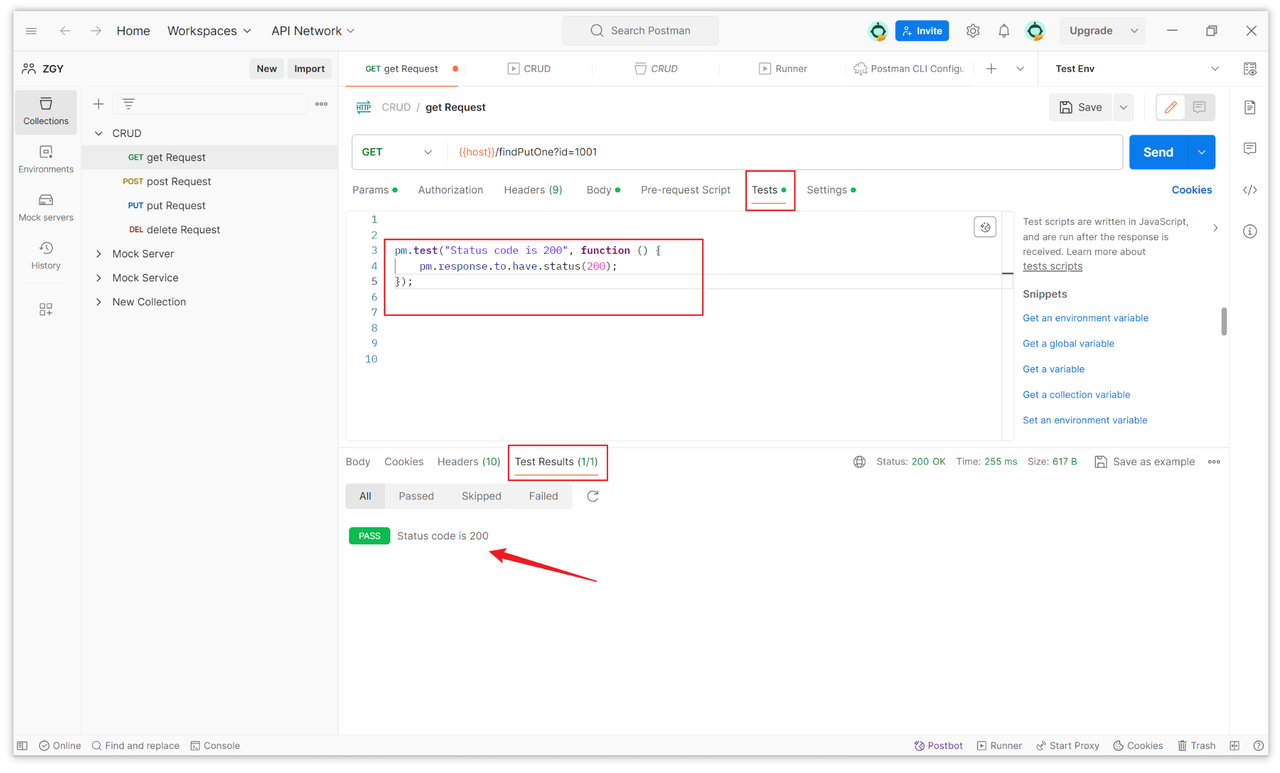
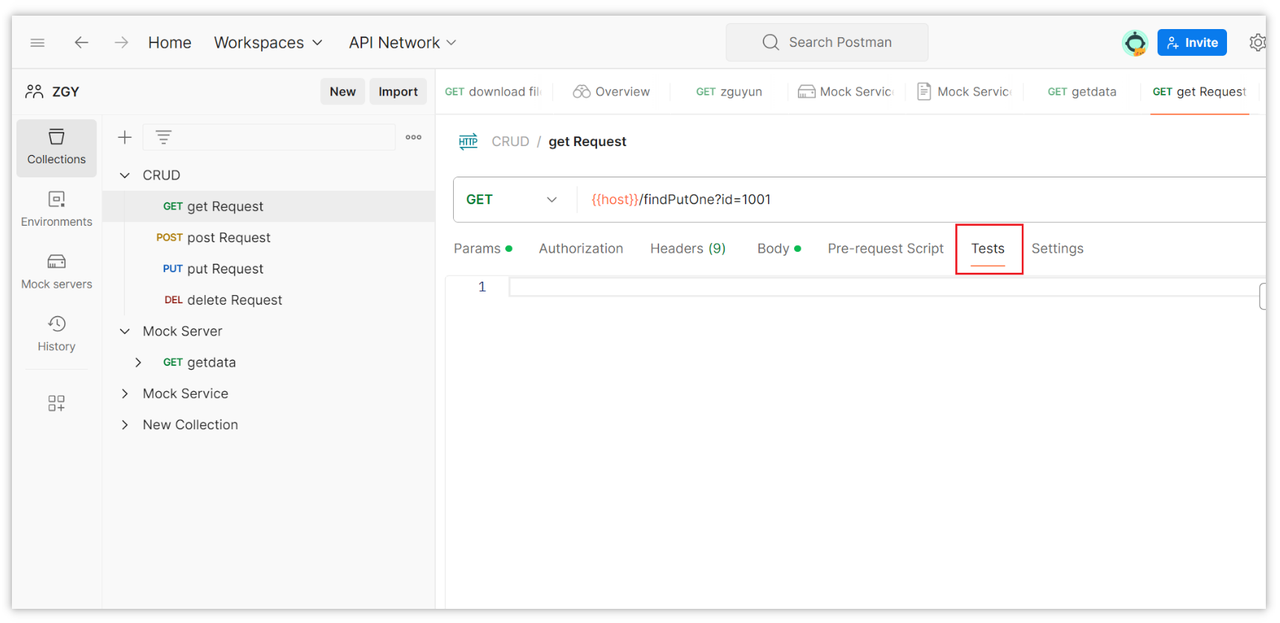
In the request editing interface, go to the "Tests" tab and write JavaScript test scripts.
pm.test("Status code is 200", function () {
    pm.response.to.have.status(200);
});
2. Run Test Scripts
After sending the request, check the test results in the "Test Results" tab at the bottom.
Other Postman Tutorials

Conclusion
With this guide, you should now have a comprehensive understanding of how to use Postman. From basic concepts to core features, Postman provides rich and powerful tools for API development and testing. As you delve deeper into Postman through practical use, you'll master its advanced features, providing efficient support for your team's development and testing processes. We hope you experience a more enjoyable and productive development journey using Postman!

Learn more:
Learn more:
- Comprehensive Guide to Implementing Automated Testing in Postman: A Deep Dive
- What is Postman?Comprehensive introduction
