Introduction to Using Request Headers in Postman
In Postman, by opening the application, navigating to the headers section, adding request headers, and setting common request headers like Accept, Authorization, etc., you can send customized HTTP requests.
When you're sending requests using Postman, the request headers are one of the crucial components you can include in an HTTP request. Request headers contain metadata about the request, which is vital for the server to process it. Below is a detailed guide with visuals on how to use request headers in Postman.
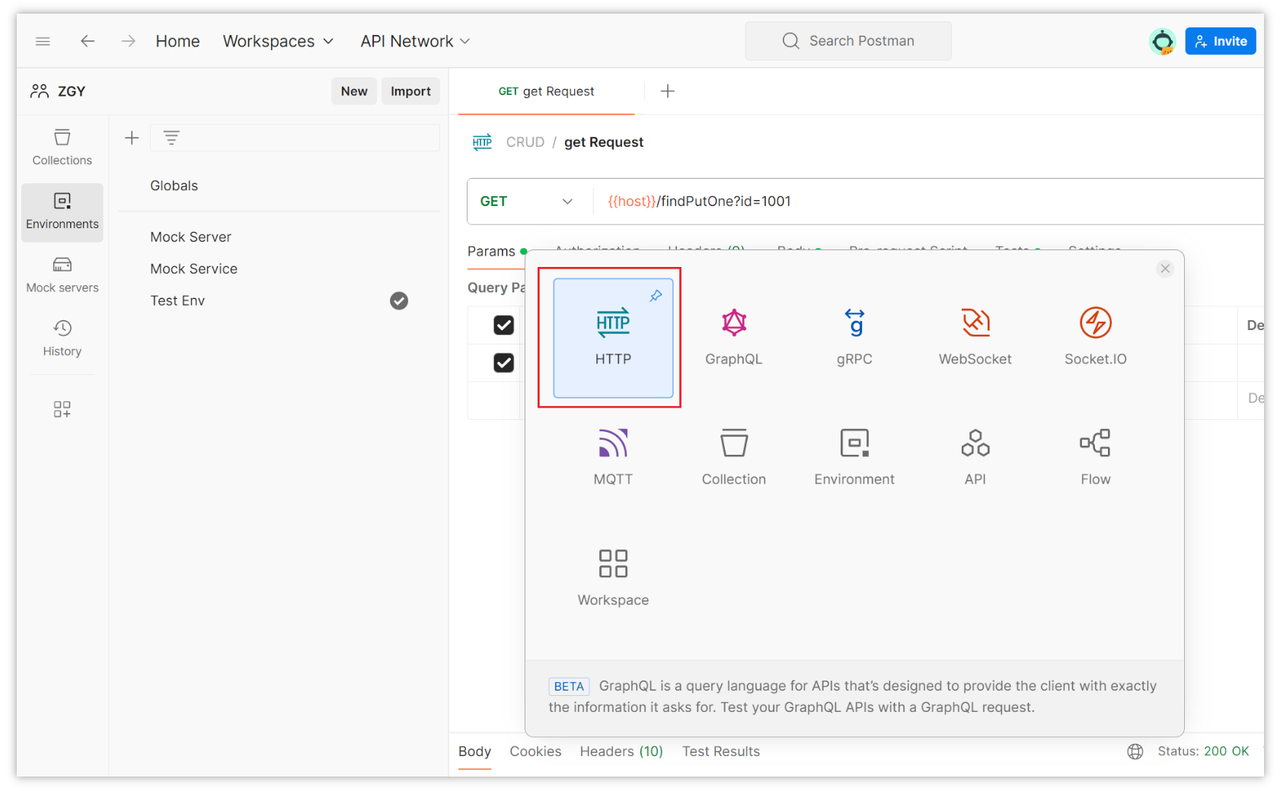
1.Open Postman
Firstly, open the Postman application and create a new request or open an existing one.

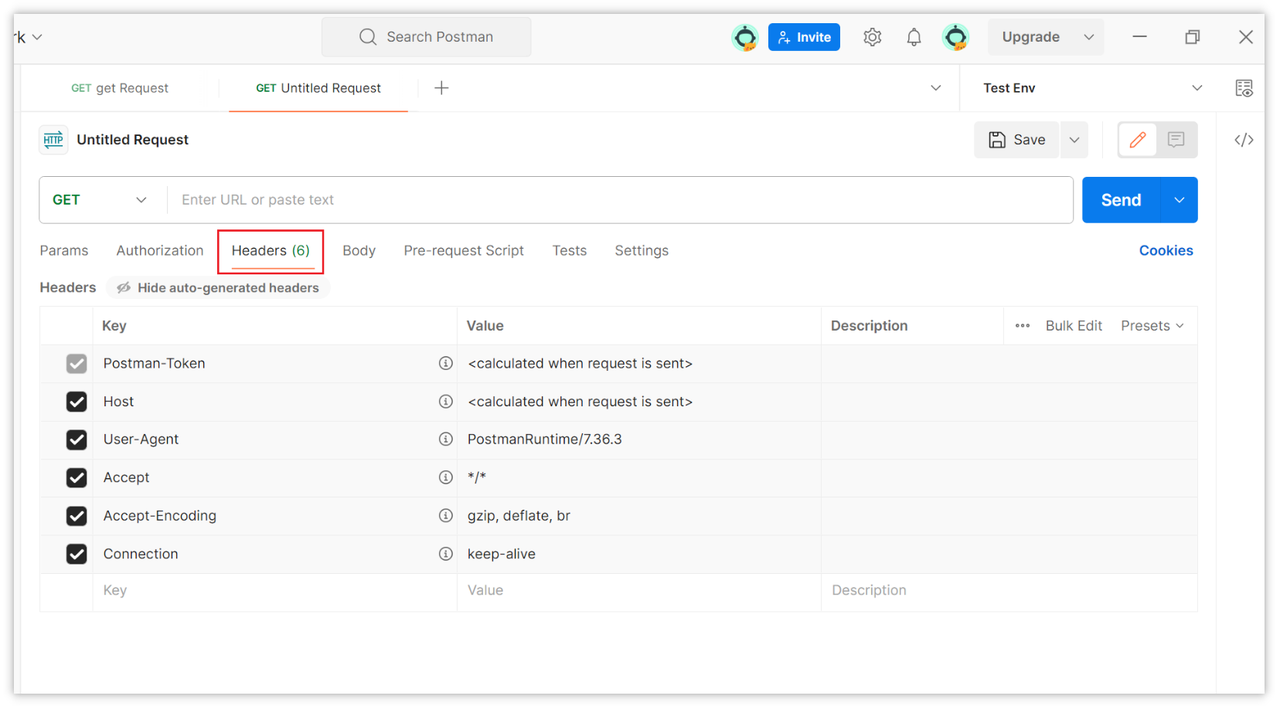
2.Navigate to the Headers Section
In Postman, you can set request headers under the "Headers" tab of the request; you can find this tab at the top of the request editor.

3.Add Request Headers
After clicking on the "Headers" tab, you'll see a blank table where you can add request headers. Each request header consists of a key-value pair separated by a colon, like Key: Value.

4.Common Request Headers
Here are some common request headers and their purposes:
Request Header | Example Value | Description |
Accept | application/json, text/html, application/xml | Specifies the content types that the client can accept. |
Accept-Encoding | gzip, deflate | Specifies the content encodings that the client can accept. |
Authorization | Bearer eyJhbGciOiJIUzI1NiIsInR5cCI6IkpXVCJ9... | Contains credentials for authenticating the request, usually a token or username/password. |
Cache-Control | no-cache, max-age=0 | Controls caching behavior, like forcing cache refresh or specifying cache validity. |
Content-Type | application/json | Specifies the MIME type of the data contained in the request or response. |
Cookie | session_id=abc123; user_pref=dark | Contains cookies previously set by the server for session establishment. |
Host | api.example.com | Specifies the hostname and port number of the server being requested. |
Referer | https://www.google.com | Contains the URL of the current page, typically used for tracking the source of the request. |
User-Agent | Mozilla/5.0 (Windows NT 10.0; Win64; x64)... | Contains information about the user agent initiating the request, typically used to identify client applications. |
X-Requested-With | XMLHttpRequest | Identifies whether the client is sending the request via Ajax. |
Content-Length | 348 | Specifies the length of the request body in bytes. |
Origin | https://www.example.com | Specifies the origin of the request, used for cross-origin requests. |
If-None-Match | W/"123456789" | Used for conditional GET requests, indicating a 304 Not Modified if the ETag matches. |
These request headers are some of the standard headers commonly used in HTTP requests. You can freely add other custom headers as per your requirements. |
5.Example
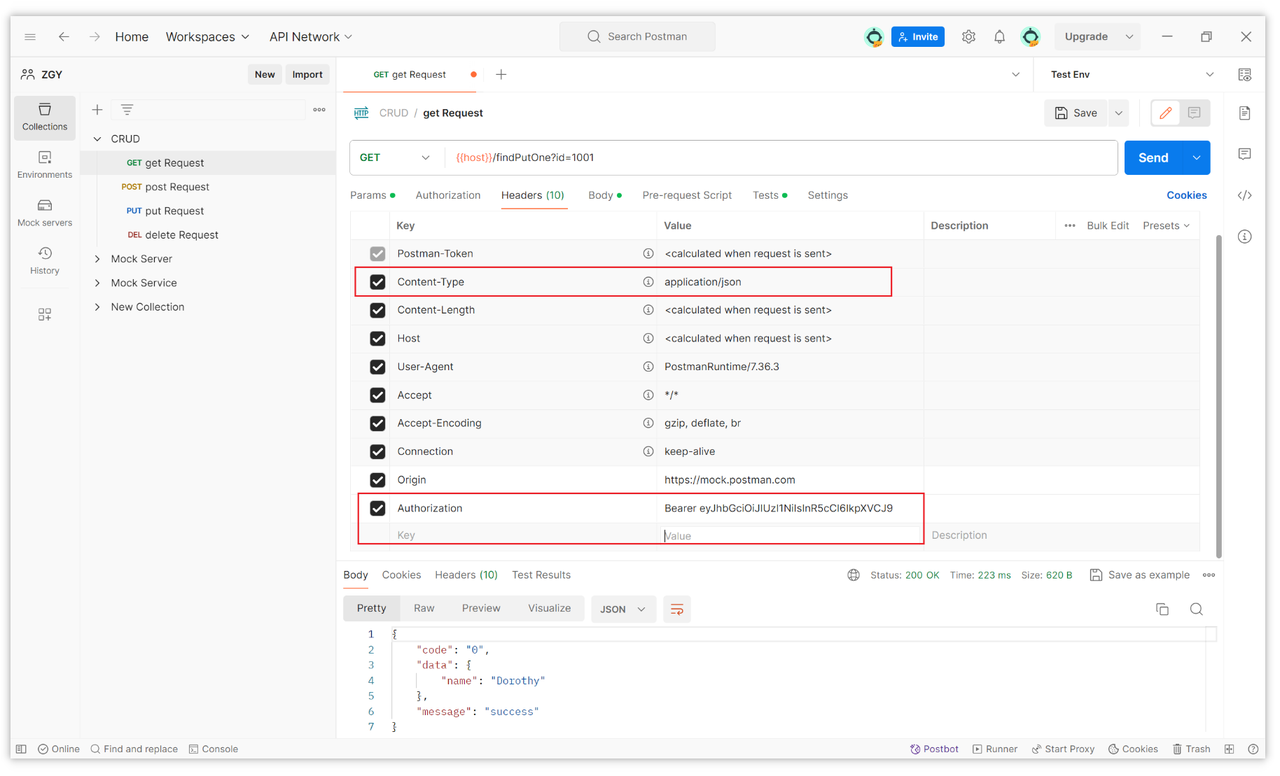
Let's say we want to send a POST request in JSON format and include an authentication token. We can add the following request headers:
Content-Type: application/json,which is already included by default in Postman.Authorization: Bearer <token>,the authentication token.

6.Save and Send the Request
Now, you can click on the send button to dispatch the request. The server will process the request based on the headers you've set and return the corresponding response.
Through these steps, you can utilize request headers in Postman to send customized HTTP requests and add any number and type of request headers as needed.
Summary
When using Postman to send requests, request headers are an essential part of HTTP requests, containing crucial metadata vital for server processing. In Postman, by opening the application, navigating to the headers section, adding request headers, and setting common request headers like Accept, Authorization, etc., you can send customized HTTP requests.

Reference:
Learn more:
- The differences between form-data, x-www-form-urlencoded, raw, binary, and GraphQL in Postman's Body
- How to set global request header information in Postman
- Comprehensive Guide to Implementing Automated Testing in Postman: A Deep Dive
Learn more:
- How to extract parameters from the request body in Postman Tests?
- The differences between form-data, x-www-form-urlencoded, raw, binary, and GraphQL in Postman's Body
